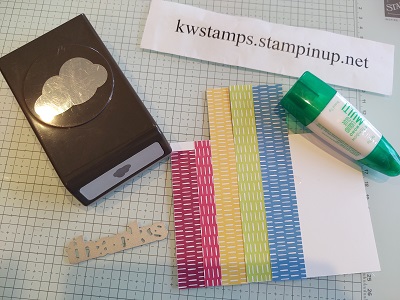
You know I love my Designer Paper, and also ways to use up my scraps. This technique can be used with any punch or die cut to make a rainbow of color.
Here I used the cloud punch (retiring and on sale) and the latest Paper Pumpkin Add-on. The Brights paper was perfect to make the strips. I did 3/4″ but any width will work.
TIP: To make this work, the strips need to be entirely adhered to a backing sheet so the bits don’t fall off after cutting. The best way is to use Adhesive Sheets, then you just peel and stick when you are done cutting. Another quick way is to cover your backing sheet (I used a scrap of Basic White) with liquid glue using the broad rubber tip so you can spread it all over.
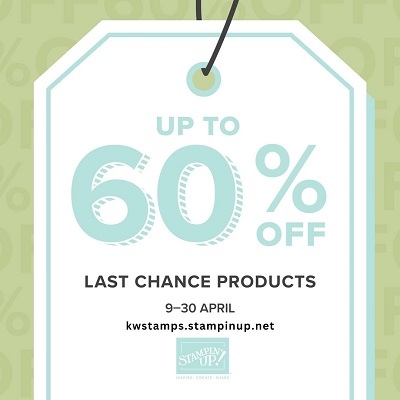
Don’t forget to grab your cloud punch in the Last Chance Sale! Check out all the product HERE at my website shop.
I’m heading out to camp for our annual Spring Craft Retreat. It’s fun to have a whole weekend to craft with friends!
Crafter Alert! This is the last month for both the Stampin’ Up! Annual and Minicatalogs and stamp sets especially are selling out quickly! Here’s the SALE LINK.
Have I ever mentioned this before? What drew me to Stampin’ Up! over 25 years ago was how expert they were at coordinating products so that I could be creative without having much artistic talent.
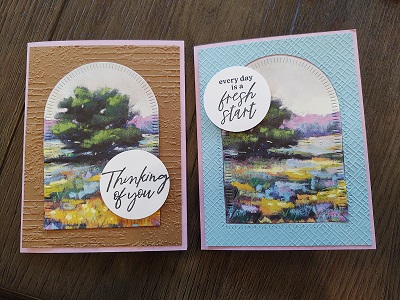
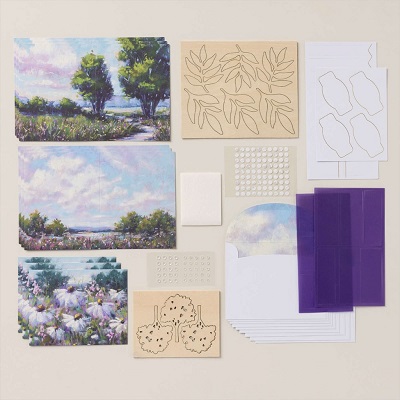
The Meandering Meadow Suite from the Online Exclusives is a top seller and one of my favorites. The gorgeous artist designed landscape Designer Series Paper coordinates with the Garden Meadow bundle and suite embellishments. Plus all Stampin’ Up! papers coordinate with Stampin’ Up! inks and markers – wow!
The Meandering Meadow Paper even looks great with some other Stampin’ Up! stamp sets like Crafting with you and IN the Moment (links below).
And the Kindest Expressions stamp set. (note – the birds and dragonfly embellishments will be back in stock next week sometime).
And the February Paper Pumpkin kit! This refill is still available in my store – link below.
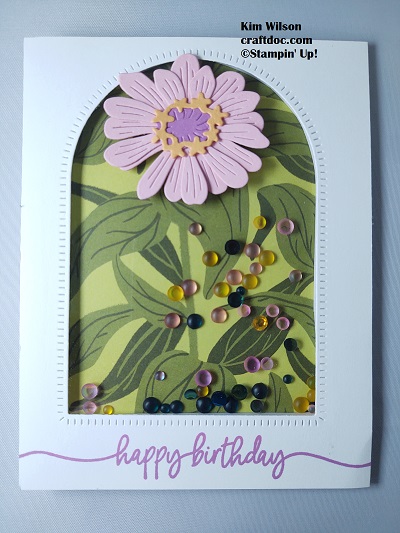
I even made a shaker card using the arch from Garden Expressions with some other products from the Online Exclusives – Simply Zinnia bundle, Zinnia DSP, Sweetly Scripted and loose frosted dots. Instructions for this card are free with any purchase from MY STORE.
I hope this inspires you to try out some of the Online Exclusive product from Stampin’ Up! as well as those in the print catalogs. If anyone needs a catalog and doesn’t have a demonstrator, please contact me through MY WEBSITE and I’ll be happy to mail you one.
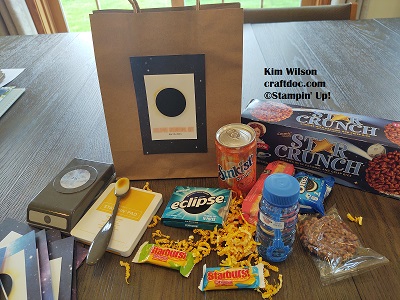
Here in Erie, PA we are in the path of totality for the April 8, 2024 Eclipse. We are going all out to celebrate! All the schools are closed for the day and many visitors are expected. I created a couple of cards to mail out and also some survival kits for my guests. I hope this gives you some ideas for your own celebration.
I had fun collecting eclipse themed items for my survival kits.
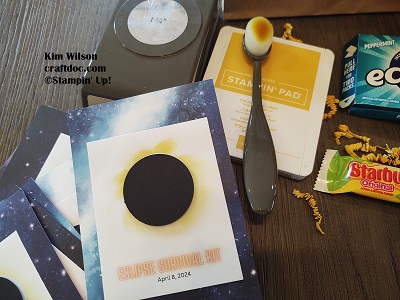
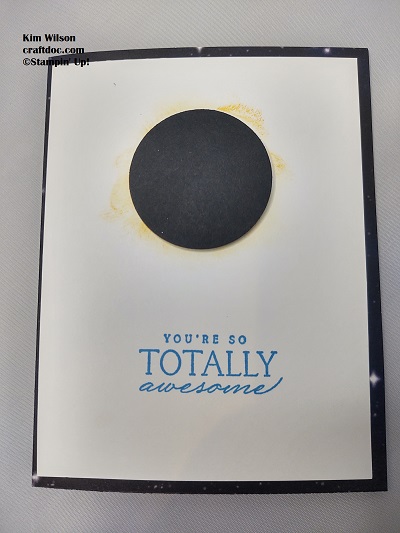
I printed the text and then added the eclipse by holding the Basic Black circle and brushing Crushed Curry ink outwards onto the white paper. I then used Stampin’ Dimensionals to pop up the black circle. I mounted the panel onto Stargazing Designer Series Paper – perfect for any “space” occasion.
The card I made to send to my mom was very simple. Again the brushed eclipse and adding the sentiment from the Waves of Inspiration stamp sent. I mounted it on a folded sheet of the Stargazing Designer Series Paper 8-1/2 x 5-1/2 scored in half.
One of the planets inside was a good spot for my greeting. I hope you have a good eclipse day too! It could be a bit cloudy here, but we still will have fun.
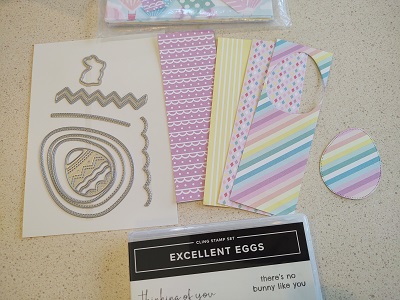
I’ve been in the mood lately to make shaker cards – especially when I saw the large egg die in the Excellent Eggs bundle by Stampin’ Up!
Heads up – Excellent Eggs is retiring soon!
I love the shaker circles – they are tiny and shiny!
Here’s a reminder on how to make a traditional shaker card:
Adhere a piece of window sheet to the back of your front panel. Be sure adhesive is all around so there are no gaps – I used a thin line of liquid glue.
Go around your cut out shape with Adhesive Strips – again leaving no gaps. Get it as close as you can without it showing from the front.
Add your shaker elements.
Remove the strip backing and add your stamped or DSP backing sheet.
Attach the entire piece to a card base.
Embellish card front as desired – I used a baker’s twine bow.
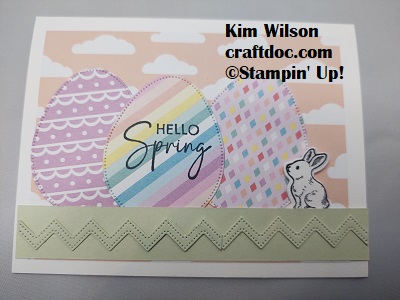
Of course, I couldn’t waste the egg die cut from the shaker card. Here I embellished it with leftover pieces from my February Paper Pumpkin kit. The refills are up right now in the store if you want to grab one – link below.
I also had some leftover scraps of Lighter than Air Designer Series Paper, perfect for some smaller eggs.
The zig zag is just one of the dies for decorating the eggs, but here I used it for my grass.
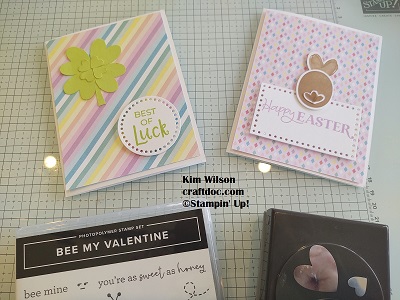
And last for this series, I used the Bee My Valentine bundle to make both a shamrock card and a bunny card. Supplies are listed below. Happy Easter!
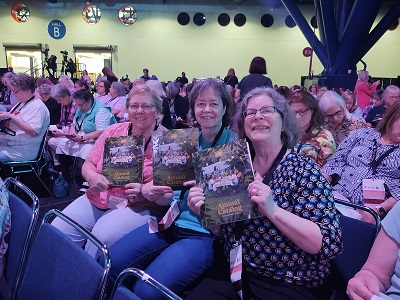
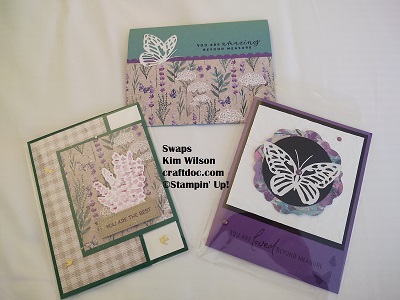
I had an amazing time at #StampinupOnStage in Houston. We were treated to wonderful gifts, beautiful presentations, amazing displays, creative make & takes and lots of fun times with our friends. I even walked the stage twice for achievements. There’s something magical about a Stampin’ Up! event – join me next March in Raleigh!
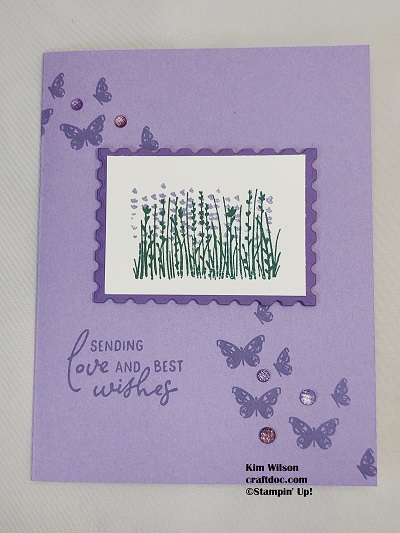
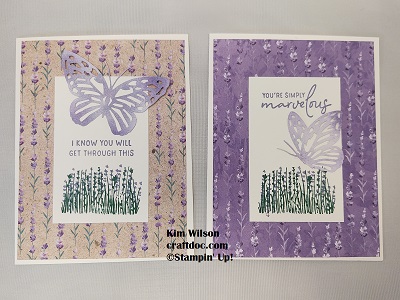
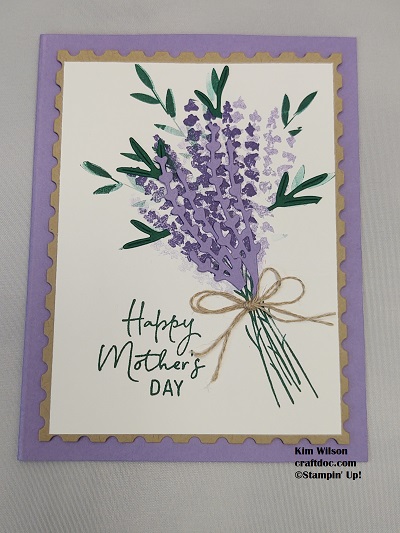
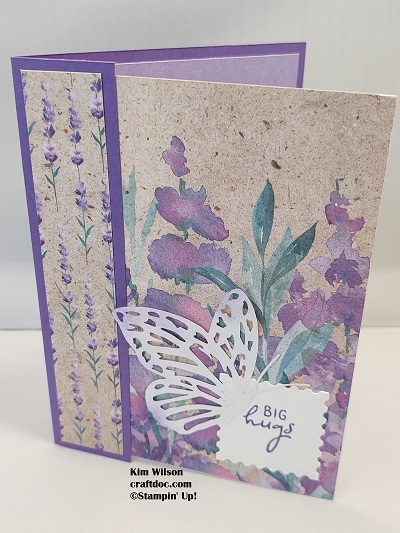
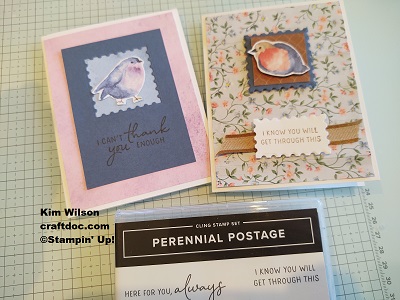
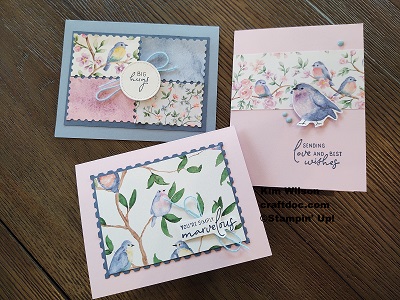
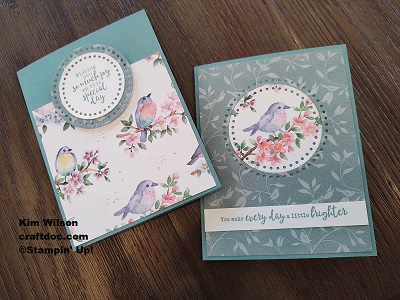
Right after I returned, was my monthly card class – both virtual and in-person. I have a few kits left for purchase featuring the Perennial Lavender Suite – contact me through my website for availability.
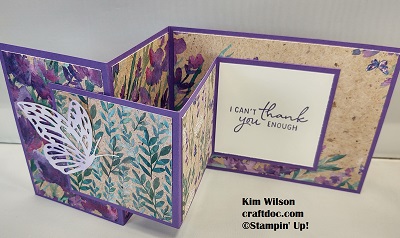
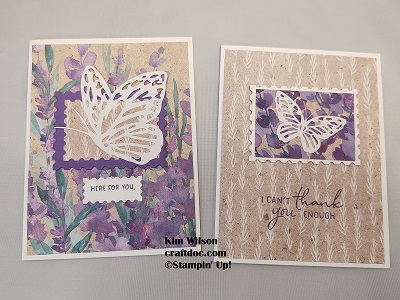
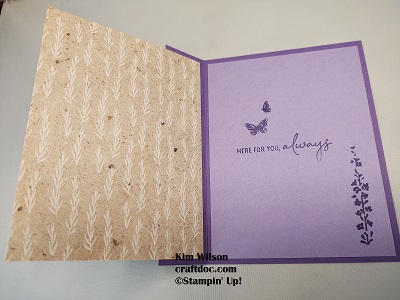
I couldn’t stop creating with this wonderful suite. Here are some more:
inside
And here are just a few of the swap cards I got at OnStage – the rest will be posted in my customer Facebook group. Be sure you are subscribed to my customer newsletter to get the scoop on all my projects and stampin’ specials.
This is such an amazing Suite! Just be sure to get the Perennial Postage stamp set soon – because it is retiring as are the gems and the butterfly accents.
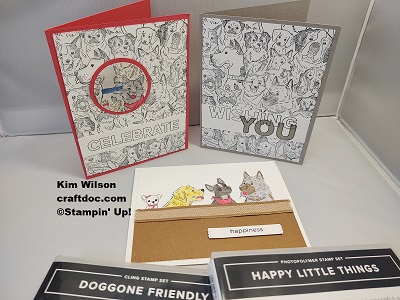
New Online Exclusives hit my Stampin’ Up! store last week and they are flying off the shelf. One of my favorites is a new sentiment stamp set bundle called Happy Little Things. Just look what it’s like combined with another popular stamp – the Doggone Friendly large background.
The large lettering for Happy Little Things comes in both open and closed fonts that you can combine for 2-step stamping. It also has some smaller sentiments to go along with the large ones for the insides of your card or as I did above with “happiness” to add to the front.
TECHNIQUE TIP: The Spotlighting Technique is an oldie but goodie. Stamp an extra section of Doggone Friendly and punch out a circle. Color with Stampin’ Blends Markers and mount on a larger Poppy Parade circle and then back onto the card front and a Poppy Parade card.
For the card above, I simply cut out a few of the dogs and colored them with Stampin’ Blends Markers. What a cute lineup!
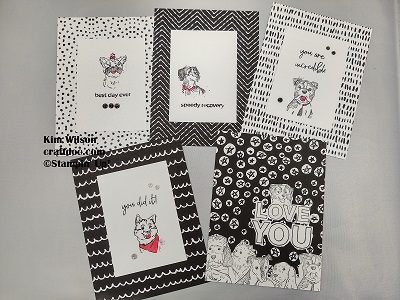
And finally, I made a few card fronts all ready to mount onto a card base. I love the snazzy black and white backgrounds of the Zoo Crew Designer Paper. Again the sentiments are from Happy Little Things and a few accents were colored with Stampin’ Blends Markers.
TECHNIQUE TIP: For the first 4 cards I inked up just one dog with the Black Stampin’ Write Marker before stamping. For the Last card I stamped and then cut out the bottom row of dogs.
Check out the Online Exclusives at my store and the other supplies below.
I’ve had several occasions lately to send Get Well, Sympathy and Thinking of You cards. Those sentiments can be so meaningful to a recipient along with a heartfelt note. You share something special when you send a handmade card to someone going through a hard time. I’m sharing a few ideas for you and some Stampin’ Up! products that fit the bill for these types of occasions.
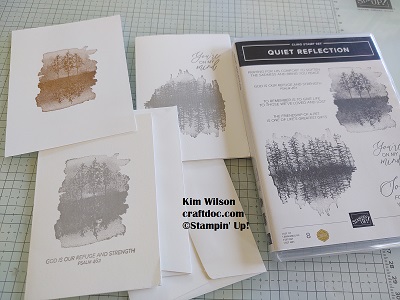
Quiet Reflection has some lovely images and beautiful sentiments – even one for someone who has lost a pet. It especially lends itself to #simplestamping using #stampinup Note Cards & Envelopes.
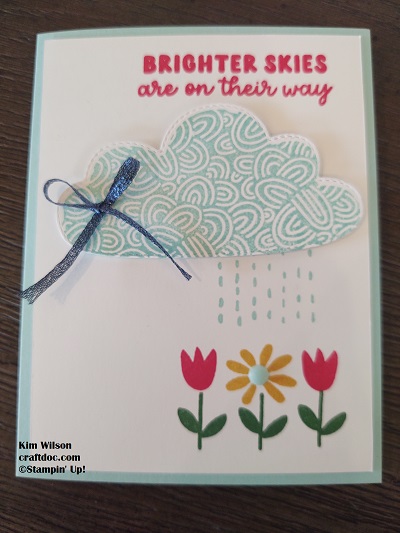
Bright Skies is one of my favorite bundles from the mini catalog. Here’s a peek at one of my swap cards for Stampin’ Up! OnStage. See 2 posts earlier for some more cards with this bright bundle, sure to send cheer to the recipient.
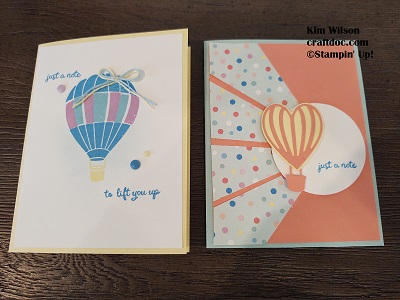
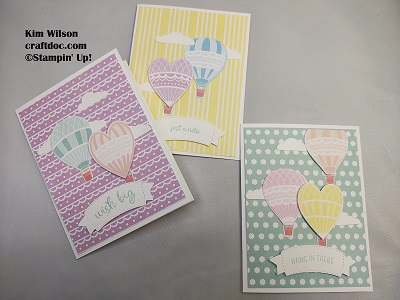
Hot Air Balloons and the entire Lighter than Air Suite are also great for these sentiments. Plus they are just fun to play with! Whether a #simplestamping card or a more involved technique using Designer Paper, you will have a lot of options with these products. The second card is from my recent class – be sure you subscribe to my newsletter to have access to tutorials and more projects.
Tip: Partially ink the “just a note to lift you up” sentiment to separate it into 2 greetings. Use either the side of your ink pad or a Stampin’ Write Marker. Or do what I did – be brave and simply cut the stamp apart!
Above are a few more that feature the Lighter Than Air Designer Series Paper. It even has some balloons that you can die cut from the paper.
Products are linked below and also in my store. I hope this gives you some ideas to bless someone that needs a kind word. This is a big part of WHY I do Stampin’ Up! – for the joy of creativity and to pass the love to others.
Filed under: Projects — February 29, 2024 @ 8:39 am
I can’t let the month go by without celebrating the fact that I have been blogging my creative journey for 18 years! Did you know that you can scroll down on the right side and see all the months of posts? Check out some of the early ones for a good laugh. Or go seasonally if you are looking for ideas for a certain holiday.
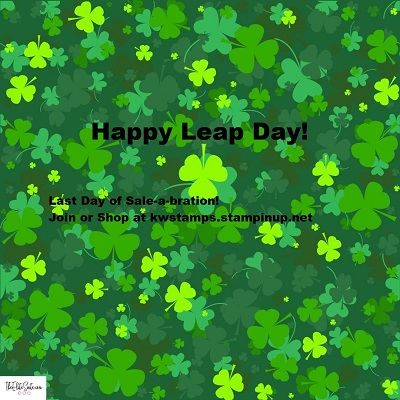
You are in luck! You have an extra day today to stock up on Sale-a-bration (SAB) freebies! Just hop on over to my Stampin’ Up! store. Be sure to check out lots of SAB projects here on the blog that I have posted over the last 2 months, including some fun fold instructions. Subscribe to my newsletter for more fun projects. And if you really don’t want to miss out on any crafting goodness, consider joining my team.
Filed under: Projects — February 27, 2024 @ 2:35 pm
Since tomorrow is the last day for Stampin’ Up! Sale-a-bration, I’ll be sharing the rest of my projects before I move on. But you can still get these products for your collection until February 29 – an extra day for shopping!
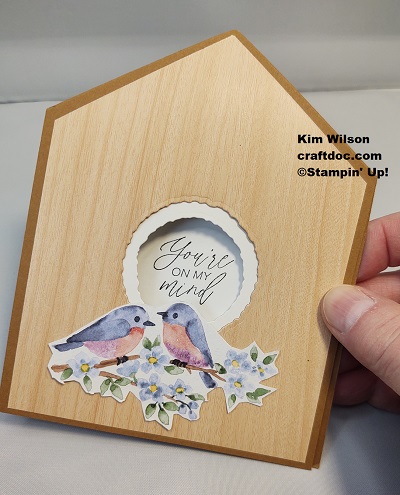
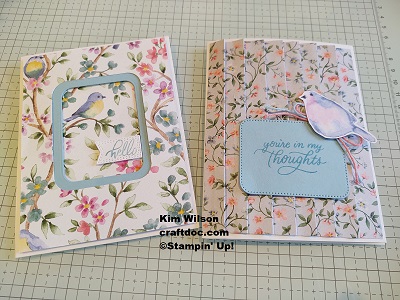
Last post I shared lots of projects with the free Bright & Airy Designer Paper. I did finally finish the birdhouse card Brenda gave me by adding a fussy cut pair of bluebirds. The sentiment is from the Quiet Reflection stamp set.
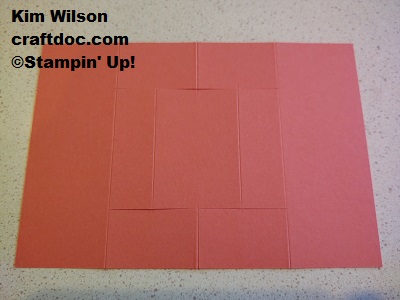
Instructions: 11x 4-1/4″ cardstock, scored at 5-1/2″. Make diagonal scores 1-1/2″ from the center, fold and tuck in.
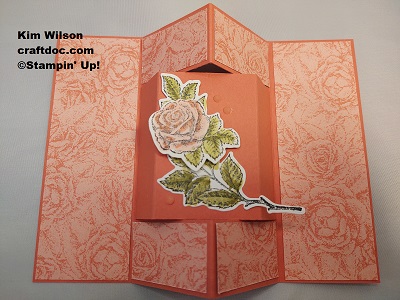
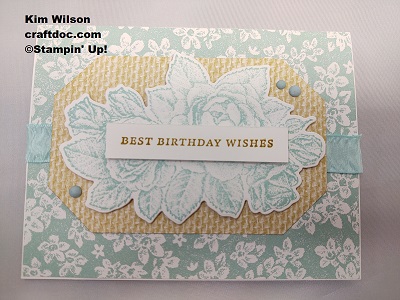
Another fun fold – center pop up card. This time using the Stippled Roses bundle with the free Softly Stippled Designer paper. I colored the rose with Stampin’ Blends markers.
And yes, it folds to fit in a standard medium envelope.
Instructions: 8x 5-1/2″ cardstock. Landscape – score at 2″ and 6″. Portrait: CUT at 1-1/2″ BETWEEN the previous scores at each side. Back to Landscape: Score the middle section between the cuts at 3 and 5″, score the top and bottom sections (on the outside of the cuts) at 4″ Designer Paper: 2 at 1-7/8 x 5-3/8″ and four at 1-1/8″ x 1-7/8″
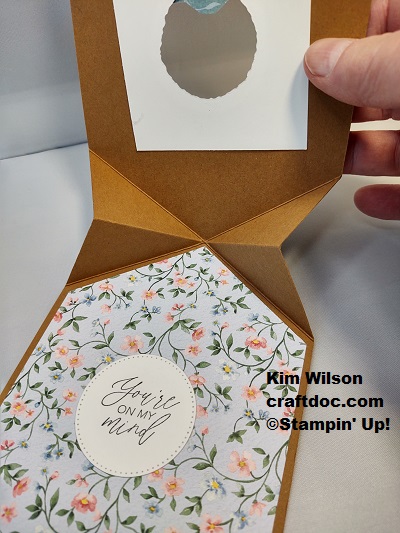
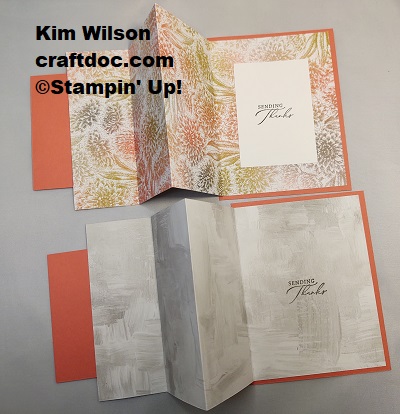
How about another fun fold using the Softly Stippled paper!
Instructions: Cardstock back: 5-1/2 x 4-1/4″ Designer Paper: 5-1/4 x 11-1/2″ score 4, 6-3/4, 9-1/2″ , Cardstock mat: 2-1/2 x 3-1/2″, Basic White layers: 2-1/4 x 3-1/4″
And above is an easier card – just adding a few layers and extra embellishments (also Sale-a-bration freebies).
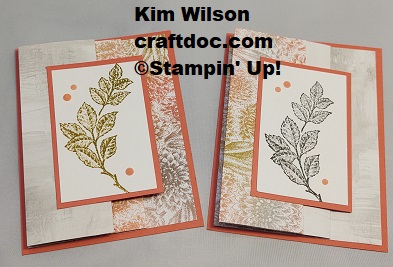
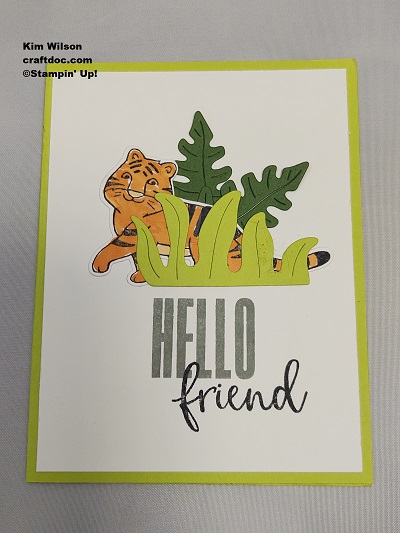
Moving on to Jungle Pals – here are a couple of #simplestamping cards – just stamps, ink and paper with notecards & envelopes.
Here I added the free Jungle Pals dies for the tiger to hide behind.
And last we have the Watercolor Melon stamp set along with the Brights Designer Paper and Stamped with love for the cute sentiment – inside it says “So you get a card”.
I hope you enjoyed all the project ideas, including instructions for 3 fun folds this week! I do appreciate purchases from my shop – just click on any of the thumbnail photos below. Be sure to subscribe to MY NEWSLETTER too.
Filed under: Projects — February 21, 2024 @ 3:46 pm
What a cute name for this gorgeous paper featuring our feathered friends. And the best thing – it’s free during Sale-a-bration by Stampin’ Up! this month!
I saw a pleated card similar to this online and had to give it a try. It was a little harder than I thought, but I had success with a 7-3/4x 5-1/4″ piece of the Flight & Airy paper and scored every 3/4 then 1/4″. I cut 1/4″ off the left side so it fit perfectly on a regular card front. I put a few lines of Tear & Tape across the back to hold it together and also to attach it to the card base. Kind of fun! I used the cut out piece from the first card for the sentiment on the pleated one.
The Perennial Postage dies and stamps made perfect backgrounds for a couple fussy cut birds from the paper. Again, I used the cut out from one card on the second.
It looks even more like a book of stamps when you put the die cuts right next to each other. Some gems and twine add a little extra special touch. The Perennial Postage dies are a real favorite that you can use over and over.
The Lost Lagoon sheet of the Flight & Airy paper makes a lovely background. This time I used the Thoughtful Expressions stamp set and dies, again using the cutout from one card onto the other.
These layouts will be great for any patterned paper of your choice. But I hope you are able to nab a pack of the Flight & Airy paper which is extra special! Check out my store or any of the links below.
This is a personal web site of Kim Wilson, an Independent Stampin' Up! Demonstrator, and I am responsible for its content. Stampin' Up! does not endorse the use of or contents of the classes, services, or non-Stampin' Up! products I may offer here.


 Designer Series Paper")


 Designer Series Paper")
")

")
")
")

")
 Designer Series Paper")


")


 Designer Series Paper")
 Circle Punch")


")


")
")


 Designer Series Paper")

")
")


")


 Designer Series Paper")
")
")


")


 Designer Series Paper")

 Bordered Ribbon")
 Circle Punch")

")
")
")


 Designer Series Paper")

")
 Designer Series Paper")


")
")
")
")

")